
Screenshot Tools for Windows Your Visual Guide
Screenshot tools for windows are essential for capturing visual information on your computer. From simple screen grabs to complex animated sequences, these tools offer various methods to capture and share images. This guide explores the world of Windows screenshot tools, covering built-in options like the Snipping Tool and Print Screen, alongside popular third-party applications. We’ll delve into advanced techniques, security considerations, and integration with other applications, ensuring you master the art of capturing and utilizing screenshots effectively.
Whether you need to document a process, share a visual idea, or troubleshoot a technical issue, understanding the different types of screenshot tools and their functionalities is key. We’ll compare and contrast various tools, helping you choose the best option for your needs, whether you’re a seasoned user or just starting out. We’ll also look at the security and accessibility considerations to ensure responsible and user-friendly practices.
Introduction to Screenshot Tools for Windows
Screenshot tools are essential utilities in a Windows environment, enabling users to capture visual representations of their computer screens. These tools are invaluable for documentation, sharing information, troubleshooting, and various other tasks. Whether you need to capture a specific window, a portion of the screen, or the entire desktop, the right tool can streamline the process.Understanding the different types of screenshots and the various methods available allows users to efficiently capture and manage these visual records.
From simple screen captures to complex editing capabilities, the options are designed to meet a wide range of user needs.
Different Types of Screenshots
Capturing different portions of the screen is crucial for diverse purposes. Understanding the various types allows users to select the appropriate tool for the specific need.
- Full-screen screenshots capture the entire display, ideal for documenting the current state of the desktop or an application. This type is useful for capturing the overall layout and contents of the screen.
- Window screenshots capture the contents of a specific window. This is particularly useful for capturing the details of a particular application or dialogue box, without the distractions of the surrounding desktop.
- Region screenshots allow users to select a specific area of the screen to capture. This provides a precise and focused capture, ideal for highlighting a particular portion of an image, a table, or a text segment.
Methods for Taking Screenshots
Windows offers several options for capturing screenshots, ranging from built-in tools to powerful third-party applications.
- Built-in tools provide a straightforward approach for basic screenshot needs. The Snipping Tool, for example, offers options for capturing full-screen, window, or region screenshots. The Print Screen key, combined with other keys, can also capture different areas of the screen.
- Third-party applications provide advanced features beyond the capabilities of built-in tools. These applications often include features like annotation tools, editing capabilities, and options for saving screenshots in various formats. They can also provide more flexibility in capturing specific screen elements or automating the process.
Saving and Sharing Screenshots
Once a screenshot is captured, various methods exist for saving and sharing it.
- Saving screenshots allows for storage and later use. Common formats include PNG, JPG, and GIF, each with specific advantages in terms of file size, image quality, and compatibility. Saving screenshots in the desired format is essential for future use.
- Sharing screenshots enables the rapid distribution of information. Methods include saving to a file and sending it via email, sharing it to cloud services like Google Drive or Dropbox, or sharing it through social media platforms.
Built-in Screenshot Tools in Windows

Windows provides several built-in tools for capturing screenshots, ranging from simple screen grabs to more advanced editing capabilities. These tools are readily available and often sufficient for basic tasks, saving the need to install additional software. Understanding their functionalities and limitations can help users make informed choices about which tool to employ for specific tasks.
Snipping Tool Functionality
The Snipping Tool is a versatile tool for capturing different shapes of screenshots. It offers flexibility beyond a simple rectangular selection. Users can create free-form snips, capturing irregular areas of the screen. Rectangular selections allow for precise capturing of specific regions, while window snips capture the entire content of an open window. Finally, full-screen snips are ideal for capturing the entire display.
After capturing the screenshot, the Snipping Tool allows for annotations, highlighting, and saving in various formats.
Print Screen Key and Variations
The Print Screen (PrtScn) key, and its variations, offer a quick way to capture the entire screen. The standard Print Screen key captures the entire screen and copies it to the clipboard. This captured image can then be pasted into an application, like a word processor or image editor. Variations like Alt + Print Screen capture only the active window, making it ideal for grabbing specific application content without capturing the entire desktop.
Finding the perfect screenshot tool for Windows can be tricky, but luckily there are tons of options out there. Speaking of which, I’m super excited for the Riordan Roosevelt boys state basketball championship Saturday! riordan roosevelt boys state basketball championship saturday is going to be a huge event, and I’m planning to capture some amazing moments with the right screenshot tool, so I can remember it all! Hopefully, I’ll be able to share the highlights with my readers afterwards, and to do that effectively, I need a great tool.
Lots of great choices exist for taking screenshots on Windows!
This is especially useful for sharing specific application data or for making presentations. The functionality is straightforward, requiring minimal steps to capture and copy the image.
Advantages and Disadvantages of Built-in Tools
The built-in screenshot tools offer ease of use and accessibility, as they are part of the standard Windows installation. They are readily available without the need for installation or configuration. Their simplicity makes them ideal for quick captures. However, some limitations exist. The Snipping Tool, while powerful for annotations, may not be as versatile for complex editing tasks as dedicated image editing software.
Print Screen’s limitations in editing and sharing capabilities may also be a drawback for users needing more control over their screenshots. The tools are generally sufficient for most common screenshot needs, but for specialized editing and sharing, dedicated software might be necessary.
Ease of Use and Accessibility
The built-in tools are generally user-friendly. The Snipping Tool offers intuitive controls for selecting different shapes and making annotations. The Print Screen key is straightforward, with its variations offering even simpler ways to capture specific windows. These tools are accessible to most users, regardless of their technical expertise, and the simple interface reduces the learning curve. This accessibility makes them readily usable by both novices and experienced users.
Comparison of Snipping Tool and Print Screen
| Feature | Snipping Tool | Print Screen |
|---|---|---|
| Selection Type | Free-form, rectangular, window, full-screen | Full-screen, window (using Alt + Print Screen) |
| Editing | Yes (annotations, highlighting) | No |
| Sharing | Yes (saving in various formats) | No (requires pasting into another application) |
The table highlights the key differences between the Snipping Tool and Print Screen, demonstrating the distinct capabilities of each tool. The Snipping Tool’s comprehensive editing and sharing features make it suitable for tasks requiring more control over the captured image, whereas Print Screen is more focused on quick captures of the entire screen or active windows.
Popular Third-Party Screenshot Tools
Beyond Windows’ built-in tools, a wealth of third-party applications offer enhanced screenshot capabilities. These tools cater to diverse needs, from simple captures to complex image editing and sharing functionalities. This exploration dives into several prominent options, highlighting their unique features and comparative strengths.
Overview of Popular Third-Party Tools
Various third-party screenshot tools are available for Windows users. These tools provide diverse functionalities, allowing for customizable screenshots, annotations, and image editing. Different tools excel in different areas, catering to diverse user needs.
Specific Third-Party Screenshot Tools
- Snagit: Known for its powerful annotation features, Snagit allows users to quickly create and edit screenshots with various tools. It offers advanced features such as screen recording, image editing, and the ability to create GIF animations. Snagit’s interface is intuitive, making it easy to navigate and use, even for those new to the software. Its robust annotation options allow for highlighting, arrows, and text boxes to be placed directly onto the captured image.
This makes Snagit particularly useful for presentations, documentation, and instructional videos.
- Lightshot: Lightshot is a lightweight and user-friendly screenshot tool. Its key strength lies in its simplicity. It provides a straightforward interface for capturing regions of the screen and annotating them. Lightshot is exceptionally easy to use, making it a great option for users seeking a quick and painless screenshot experience. Furthermore, it allows users to directly share screenshots via various platforms, which streamlines the workflow.
- Greenshot: Greenshot is a versatile tool offering a wide range of features for capturing and manipulating screenshots. It supports various capture modes, including full-screen, window, and region captures. It also provides advanced editing capabilities and a robust set of annotation options. Greenshot’s features cater to a broad spectrum of users, from those who simply need a quick capture to those who require more complex image editing capabilities.
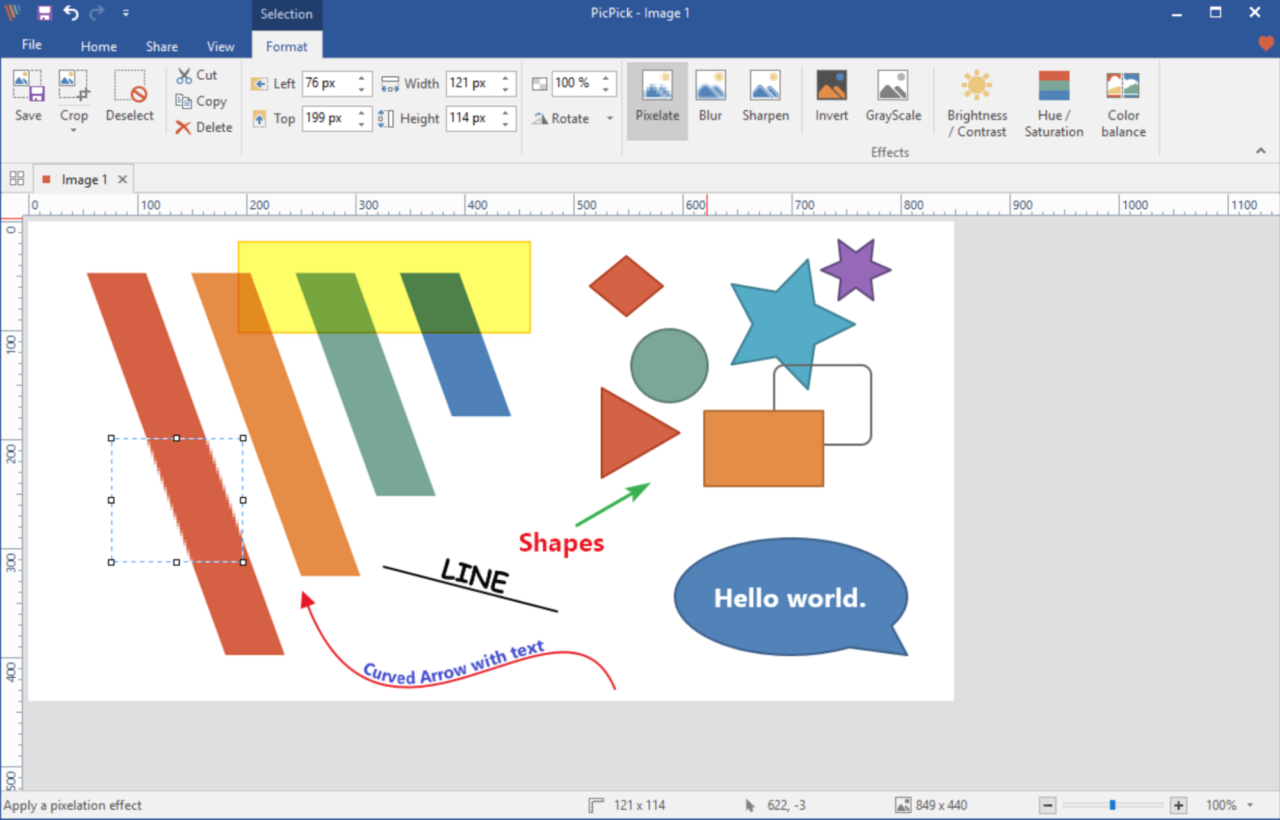
- PicPick: PicPick is a comprehensive screenshot and image editing tool. It allows for precise region selections, customizable capture modes, and the ability to capture scrolling web pages. Beyond its capturing capabilities, PicPick is highly versatile, providing advanced editing features like resizing, cropping, and color adjustments. PicPick’s intuitive design makes it an accessible option for users with varying levels of technical proficiency.
Finding the perfect screenshot tool for Windows can be a real quest, but it’s worth it! It’s amazing how much time and effort can be saved when you have a tool that works flawlessly. Considering the massive role American ports play in our economy, initiatives like climate clean american ports are crucial for a sustainable future.
Ultimately, the right screenshot tool streamlines your workflow, making your digital life much easier.
Comparison of Functionality and User Interface
| Tool Name | Key Features | Strengths | Weaknesses |
|---|---|---|---|
| Snagit | Powerful annotation, screen recording, image editing | Excellent for complex projects, presentations, and instructional videos. Intuitive interface. | Can be more complex for simple tasks. May have a steeper learning curve. |
| Lightshot | Simple, quick screenshots, easy annotation, direct sharing | Ideal for quick captures and straightforward usage. User-friendly interface. | Limited advanced editing features. May not be sufficient for extensive image manipulation. |
| Greenshot | Versatile capture modes, advanced editing, annotation options | Good balance between simplicity and advanced features. Supports various capture modes. | Interface can feel slightly cluttered for beginners compared to Lightshot. |
| PicPick | Precise region selection, scrolling web page capture, advanced image editing | Excellent for detailed screenshots and web page captures. Comprehensive editing tools. | Learning curve may be slightly steeper than Lightshot’s, though the interface is intuitive. |
Advanced Screenshotting Techniques
Beyond simple snapshots, advanced screenshotting unlocks powerful capabilities for capturing complex content and creating dynamic visuals. These techniques go beyond the basic capture and provide more sophisticated options for detailed documentation, presentations, and creative projects. Mastering these techniques can significantly enhance your workflow and productivity.
Capturing Scrolling Web Pages
Web pages often extend beyond the visible viewport, requiring multiple captures to encompass the entire content. Specialized tools offer features for capturing entire web pages, automatically scrolling and assembling the individual screenshots into a single image. This ensures comprehensive documentation of web content without the need for manual scrolling and resizing. Third-party tools frequently provide options to adjust the scrolling speed and capture intervals to accommodate diverse web layouts.
Using Third-Party Tools for Advanced Captures
Many third-party screenshot tools provide advanced capture options beyond the capabilities of built-in tools. These tools often include features for capturing specific regions, capturing entire windows, and even recording animated sequences. They often offer flexible settings for customizing capture areas and formats. Features like automatic scrolling, multiple capture areas, and the ability to capture specific elements (like text boxes or images) are common advantages.
For example, some tools can intelligently detect and capture tables or complex diagrams, saving considerable manual effort.
Creating Animated Screenshots
Animated screenshots, or screen recordings, are invaluable for demonstrating software workflows, tutorials, or complex processes. These captures, commonly saved as GIF or video files, offer a dynamic view of actions unfolding on the screen. Third-party tools often provide built-in recording capabilities with options for adjusting frame rate, quality, and recording duration. This allows for a dynamic representation of actions in a visual format, suitable for presentations or online tutorials.
For instance, demonstrating a complex software interface interaction becomes much clearer with an animated capture.
Creating Annotated Screenshots in Series
Documenting processes or comparisons frequently requires a series of annotated screenshots. This allows for highlighting specific elements, providing context, or showcasing changes over time. Tools often provide annotation features, such as drawing tools, text boxes, arrows, and highlighting. This facilitates the creation of clear and comprehensive documentation. A common workflow involves capturing multiple screenshots, then adding annotations to each frame, organizing them in a logical sequence.
This process ensures clarity and comprehensibility, essential for collaborative projects or detailed documentation. A table can visually organize the steps for annotation.
| Screenshot Number | Description | Annotation Type |
|---|---|---|
| 1 | Initial state of the application | Highlight active window |
| 2 | After clicking “Save” button | Draw arrow to the “Save As” dialog |
| 3 | Choosing a file name | Add text box for file name |
Integration with Other Applications: Screenshot Tools For Windows
Screenshot tools aren’t just about capturing images; they’re powerful tools for enhancing productivity by seamlessly integrating with various Windows applications. This integration allows users to effortlessly incorporate visual elements into documents, presentations, and communications, greatly improving the clarity and impact of their work. From simple pasting to sophisticated automation, the possibilities are vast.
Integrating Screenshots into Documents
The most straightforward integration involves copying and pasting screenshots into documents like Microsoft Word or Google Docs. This method is suitable for adding visual aids to reports, articles, or any content that benefits from visual reinforcement. The process is generally straightforward; simply capture the screenshot and paste it into the desired location within the document. Formatting options within the document application can then be used to adjust the size and position of the image to fit the layout.
Integrating Screenshots into Presentations
Screenshots are invaluable assets in presentations, whether for software demonstrations, technical guides, or visual storytelling. They can be easily inserted into PowerPoint or similar presentation software, helping to illustrate complex concepts or procedures more effectively. Similar to document integration, copy and paste is the fundamental method, followed by adjustments to size and positioning for optimal presentation impact.
Integrating Screenshots into Emails
Screenshots are excellent for supporting explanations or troubleshooting in emails. Including relevant visuals helps ensure that recipients understand the issue or message clearly. Simply capture the screenshot and attach it to the email, ensuring proper resolution for clarity. If the screenshot is small, embedding it directly within the email body might be more practical.
Integrating Screenshots into Other Applications
Many applications have their own methods for incorporating screenshots. Web browsers often offer a way to save a screenshot of the current page. Specialized software like design tools or video editors may have built-in capture functions or integrate with existing screenshot tools for streamlined workflows. Knowing these specific methods for particular applications will greatly improve efficiency.
Automating Screenshot Capture with Scripts
Automating screenshot capture is particularly useful for repetitive tasks, such as creating documentation for software updates or regular monitoring of system performance. Batch files and scripting languages like Python can automate the entire process. For example, a batch file can be scheduled to capture screenshots at specific intervals and save them to a designated folder. Python scripts can be used for more complex scenarios, such as analyzing data within screenshots or triggering actions based on the captured images.
Example: Automating Screenshots with a Batch Script
A simple batch script can capture a screenshot and save it with a timestamp:
@echo offsetlocalset “screenshot_folder=C:\Screenshots”set “timestamp=%date:~10,4%-%date:~4,2%-%date:~7,2%_%time:~0,2%-%time:~3,2%-%time:~6,2%”set “filename=screenshot_%timestamp%.png”mstsc /f /v:remote_computertimeout /t 30 /nobreak >nulscreenshot.exe /F /A /N %screenshot_folder%\%filename%
This script first sets the destination folder and creates a filename with a timestamp. Then it starts a remote desktop session, waits for 30 seconds (adjust as needed), and captures the screenshot using the screenshot tool, saving it to the specified folder. Remember to replace `screenshot.exe` with the actual path to your screenshot tool and `remote_computer` with the target computer’s name.
Adapt this script for your specific needs, including error handling, and other commands.
Security Considerations
Screenshot tools, while seemingly innocuous, can present security vulnerabilities if not used responsibly. Understanding these risks and implementing appropriate safeguards is crucial for protecting sensitive information. Careless use of screenshot tools can inadvertently expose confidential data, compromising privacy and potentially leading to unauthorized access.Protecting sensitive information is paramount. By recognizing potential security pitfalls and implementing proactive measures, users can significantly reduce the risk of data breaches.
This section explores critical security considerations for screenshot tools, from potential risks to practical mitigation strategies.
Potential Security Risks
Careless handling of screenshots can lead to various security risks. These risks encompass unauthorized access to confidential information, potential data breaches, and compromise of system security. It’s important to be aware of these risks and implement appropriate safeguards to protect sensitive data.
- Exposure of Confidential Information: Screenshots can inadvertently capture sensitive data, such as passwords, credit card details, or personal identification numbers (PINs). This data, if compromised, can lead to identity theft or financial fraud.
- Data Breaches: Sharing screenshots containing sensitive information with untrusted parties can lead to data breaches. This is particularly concerning in shared work environments or online communities.
- System Compromise: Certain screenshot tools may have vulnerabilities that can be exploited by malicious actors. This could potentially grant unauthorized access to the system, leading to further security breaches.
- Malware Distribution: In rare cases, malicious actors might utilize screenshot tools to spread malware. This involves concealing malicious code within the captured image, which is then executed when the image is viewed.
Mitigation Strategies
Implementing robust security measures can significantly reduce the risks associated with screenshot tools. These strategies focus on user awareness, secure practices, and appropriate tool selection.
- Review Screenshots Before Sharing: Always review the captured screenshot before sharing it to ensure that no sensitive information is inadvertently included. This involves verifying that confidential data is obscured or redacted.
- Employ Data Redaction Techniques: Using image editing tools to redact sensitive information from screenshots is essential. This technique involves obscuring or removing personally identifiable information (PII).
- Secure Storage of Screenshots: Storing screenshots in secure locations, such as encrypted folders or cloud storage with strong access controls, is vital. This practice limits access to authorized personnel only.
- Use Strong Passwords and Two-Factor Authentication: Employing robust passwords and enabling two-factor authentication (2FA) is critical for protecting access to any application or service that handles sensitive information, including screenshot tools.
Choosing Secure Screenshot Tools
Selecting a secure and reliable screenshot tool is crucial for maintaining data integrity. Factors such as open-source nature, encryption capabilities, and user reviews play a significant role in the decision-making process.
- Evaluate Open-Source Tools: Open-source screenshot tools allow users to examine the code for potential vulnerabilities. This transparency can help identify and mitigate potential risks.
- Look for Encryption Features: Screenshot tools with built-in encryption features can protect captured images from unauthorized access. This ensures that sensitive data remains confidential during storage and transmission.
- Review User Reviews and Feedback: Thorough examination of user reviews and feedback provides insights into the reliability and security of a specific tool. This allows users to gauge the tool’s stability and robustness.
Importance of Strong Passwords and Two-Factor Authentication
Robust passwords and two-factor authentication are essential for securing access to any application, including screenshot tools. This significantly reduces the risk of unauthorized access and data breaches.
- Strong Passwords: Use complex passwords that incorporate a combination of uppercase and lowercase letters, numbers, and symbols. Avoid using easily guessable passwords, such as names, dates, or common phrases.
- Two-Factor Authentication (2FA): Enabling 2FA adds an extra layer of security by requiring a second verification method, such as a code from a mobile app, in addition to a password. This significantly reduces the risk of unauthorized access even if a password is compromised.
Accessibility and Customization
Screenshot tools are crucial for capturing and sharing visual information, but their effectiveness hinges on usability for everyone, including those with disabilities. This section explores the accessibility features and customization options available in various screenshot tools, highlighting the importance of tailoring these tools to diverse user preferences. Customization empowers users to adapt the tools to their specific needs, while accessibility ensures inclusivity.Screenshot tools often come with features designed to make them usable for a wider range of users.
Finding the perfect screenshot tool for Windows can be a real game-changer, but did you know that understanding your YouTube video ranking can also be crucial? Tools like youtube rank checker tools can help you analyze your video’s performance, and that insight can, in turn, inform your screenshot strategy. Ultimately, a good screenshot tool is still essential for capturing and sharing key moments, especially if you’re trying to explain a complex YouTube ranking strategy.
These features, while not always extensive, are becoming increasingly common in both built-in and third-party applications. A key component of a well-designed screenshot tool is its ability to be customized to suit individual preferences, including those with specific needs or disabilities.
Accessibility Features
Many screenshot tools now offer basic accessibility features to enhance usability for individuals with disabilities. These features are often simple but impactful, allowing users to perform common tasks with greater ease. For example, some tools allow users to adjust the size of the selection box, enabling easier identification of the area to capture. Similarly, options to customize the color contrast and font size help those with visual impairments.
Furthermore, some tools support keyboard navigation, enabling users to capture screenshots without a mouse. Speech recognition integration can be an additional helpful element.
Customization Options
The ability to customize screenshot tools is vital for catering to varied user preferences. Different users have different needs and ways of working, and tools with customizable options can accommodate these preferences. Adjusting settings allows users to optimize their workflow and capture screenshots in the most efficient way possible. This is particularly important for users who rely heavily on these tools for work or daily tasks.
Examples of Accessible Features, Screenshot tools for windows
Accessible features can range from straightforward options to more sophisticated integrations. For example, tools with adjustable color contrast allow users with visual impairments to better differentiate elements on their screen. Similarly, tools that support keyboard navigation enable users who may not be able to use a mouse to still capture screenshots.
Customization Options Table
| Tool Name | Customization Options | Accessibility Features |
|---|---|---|
| Windows Snipping Tool | Delay before capture, shape of selection, output format, saving location, and hotkeys | Adjustable color contrast, basic keyboard navigation, limited font size adjustments |
| Greenshot | Hotkeys, delay settings, output format, image editing options, and various capture modes | Adjustable font size and color contrast, keyboard navigation, customizable toolbars |
| LightShot | Hotkeys, delay, various capture modes, output format, and image editing | Adjustable font size and color contrast, keyboard navigation, customizable toolbars, and image editing tools |
Examples of Screenshots
Screenshots are a fundamental tool for visually documenting and communicating information. From troubleshooting technical issues to explaining complex processes, screenshots offer a powerful way to convey ideas and solve problems quickly and efficiently. They act as tangible representations of what’s happening on a screen, allowing for clear and concise communication across various contexts.
Scenarios for Screenshot Usage
Screenshots are indispensable in a wide range of situations. Their ability to capture visual information makes them valuable tools for various scenarios.
- Problem Solving: A common use case is troubleshooting software or hardware issues. A screenshot of an error message, a system configuration window, or a specific application’s behavior can provide crucial context to a technical support representative or an online community forum. This allows others to quickly understand the problem and potentially offer a solution. For instance, if a user is experiencing a “failed to connect” error while using a video conferencing application, a screenshot of the error dialog box can immediately pinpoint the issue.
- Communication: Screenshots are effective in everyday communication. They can illustrate a specific step in a process, a confusing feature of a website, or a design concept. If someone needs to explain how to access a specific menu item in a program, a screenshot demonstrating the exact steps required is more efficient than a lengthy written description. A screenshot can also be used to show a user a particular website layout or design, allowing them to quickly understand the structure and functionality.
- Technical Support: In technical support, screenshots are invaluable. They allow technicians to see exactly what a user is experiencing, enabling them to diagnose issues quickly. Screenshots can be used to document problems like a network error, a software crash, or a configuration issue. This enables support personnel to quickly assess the situation, offer effective troubleshooting steps, and provide solutions.
- Educational Settings: Screenshots can aid in education by illustrating concepts and procedures. A screenshot of a chemical reaction, a historical map, or a complex mathematical formula can enhance comprehension and provide visual reinforcement. In a software training course, screenshots can be used to show students exactly where to click, which buttons to press, and how to perform specific actions.
Documenting Procedures with Screenshots
A systematic approach to using screenshots to document procedures can be highly effective. This methodology ensures that processes are clearly understood and consistently followed.
- Establish a Consistent Naming Convention: Use a clear and consistent naming convention for your screenshots. This might include the date, time, a descriptive title, and a short identifier for the procedure being documented. For example, “2024-10-27_LoginProcedure_Step1.png”. This helps in organizing the screenshots and locating them easily later.
- Create a Separate Folder: Designate a specific folder for all screenshots used in documenting procedures. This maintains a structured repository of all relevant visual documentation. This folder should be easily accessible and organized in a way that makes it simple to find specific screenshots.
- Include Contextual Information: Each screenshot should be accompanied by a brief, clear description explaining the context and purpose of the image. This information helps in understanding the steps depicted in the screenshot. A short description can include details such as the step number, the specific action being performed, or the current state of the system being documented.
- Sequence Screenshots Logically: Screenshots should be sequenced logically to follow the steps in a procedure. This chronological order makes it easy to follow the instructions and replicate the procedure accurately. The sequence is important, as the screenshots should present the steps in the order they should be performed.
Conclusive Thoughts
In conclusion, this exploration of screenshot tools for Windows highlights the diverse options available to capture and share visual content. From basic to advanced techniques, you now have a comprehensive understanding of how to effectively utilize these tools. Whether you opt for the built-in simplicity of the Snipping Tool or explore the expanded features of third-party applications, remember to consider your specific needs and preferences.
Remember security and accessibility are important aspects to consider when selecting your tool of choice. By mastering these tools, you can significantly enhance your productivity and communication skills.